
In order to display your Instagram photos on your own website, you need to generate an access token to display your photos. This tutorial is a quick breakdown of the steps to get the Access Token and you don’t have to be a coder or developer to follow most of these steps.
To get a Client ID you need to be registered on Instagram. Create an account or log in using the existing account to pass on to the next step.
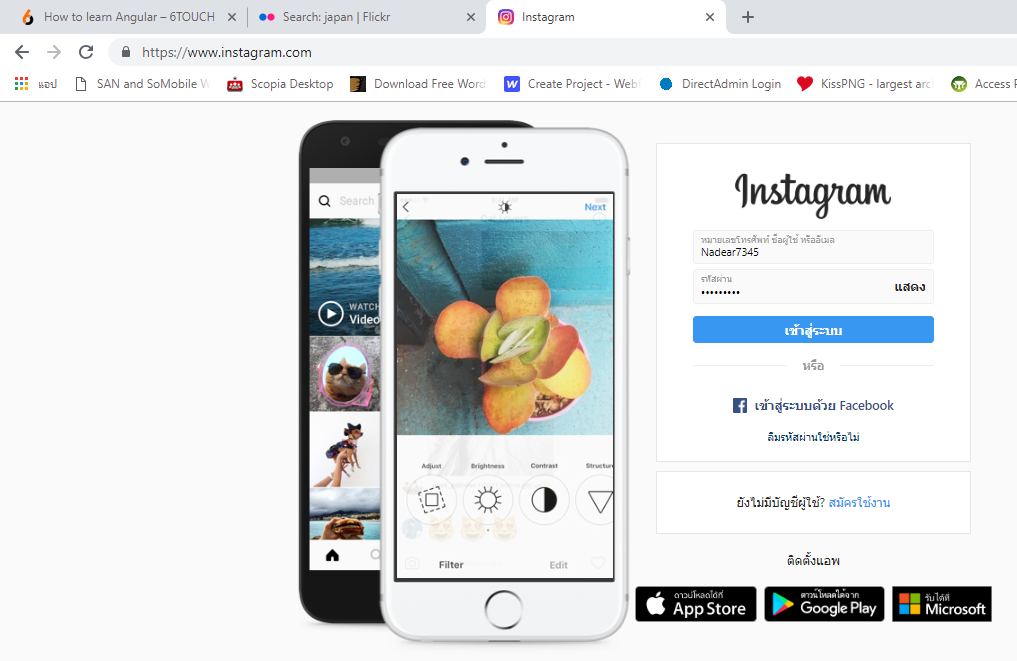
Step 1 – Login your Instagram
You are what you are seen to be
When, while the lovely valley teems with vapour around me, and the meridian sun strikes the upper surface of the impenetrable foliage of my trees, and but a few stray gleams steal into the inner sanctuary, I throw myself down among the tall grass by the trickling stream; and, as I lie close to the earth, a thousand unknown plants are noticed by me: when I hear the buzz.
Grass by the trickling stream; and, as I lie close to the earth, a thousand unknown plants are noticed by me: when I hear the buzz.
A wonderful serenity has taken possession of my entire soul, like these sweet mornings of spring which I enjoy with my whole heart. I am alone, and feel the charm of existence in this spot, which was created for the bliss of souls like mine. I am so happy, my dear friend, so absorbed in the exquisite sense of mere tranquil existence, that I neglect my talents. I should be incapable of drawing.
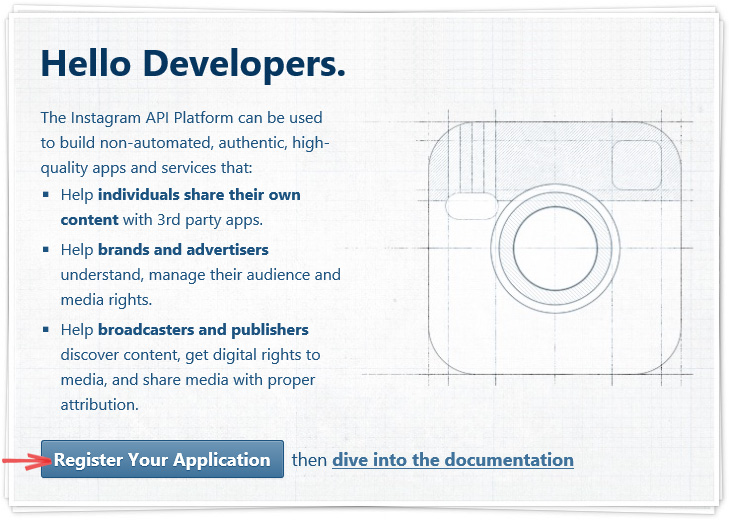
Step 2 – Register Application
Before getting your Access Token you have to register as a developer in Instagram and to receive Client ID. Please visit https://www.instagram.com/developer and register a new app.
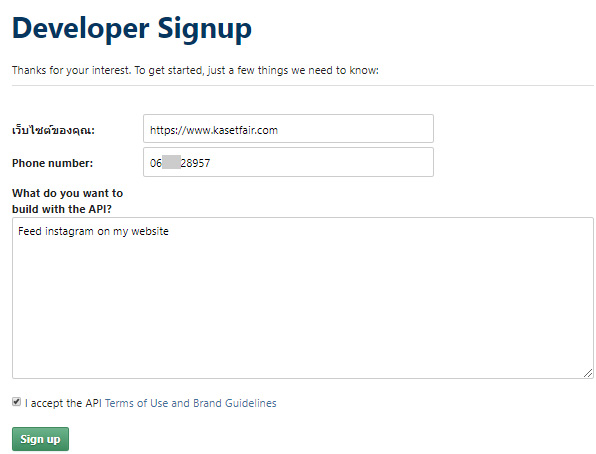
Step 3 – Fill in the Developer Sign up
Instagram demands to be registered as a developer from everyone, who wants to display Instagram feed on his website. After you log in Instagram the next window will appear.
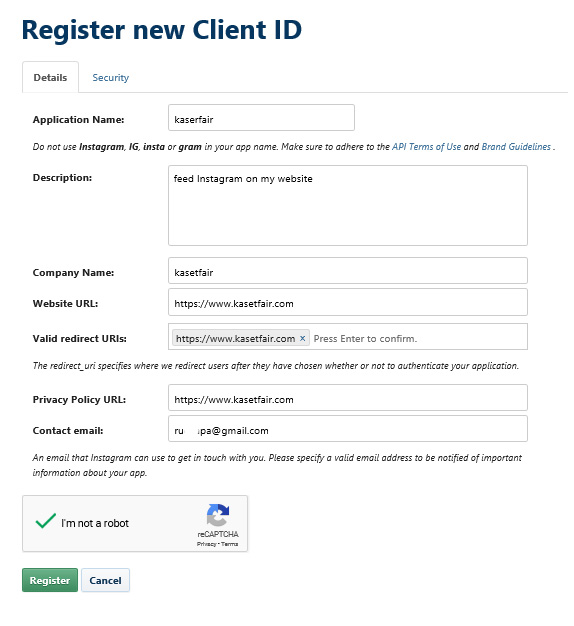
Step 4 – Register New App Client
Go to Manage Clients, and hit Register a New Client to register and gain API access.

Step 5 – Register your App
The next step is filling the form with your website data.
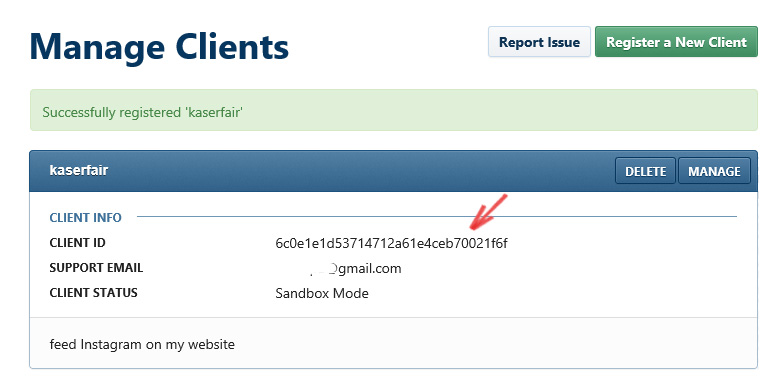
Step 6 – Copy or Save Client ID
Copy the Client ID here, or at least keep this tab open, you will need the Client ID to generate the Access Token.
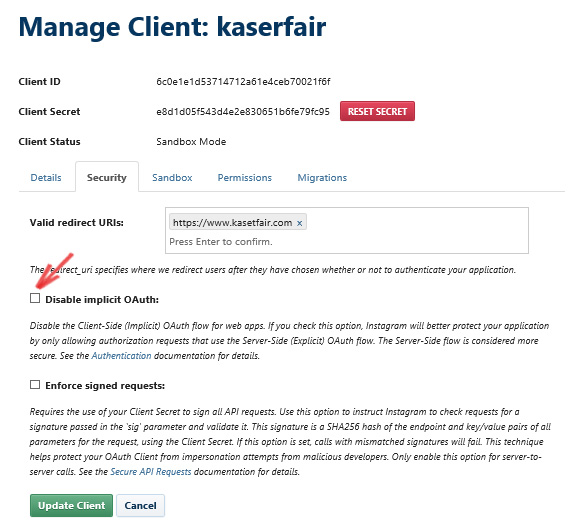
Step 7 – Configure Client for Public Access
Click Manage on your app from the Manage Clients screen, then open the Security tab and uncheck the Disable Implicit OAuth since we’d like the public to be able to see our feed.
Step 8 – Use this API URL in abrowser
You can use a simple URL in your browser to grab your access token. Open your browser and paste the url below, replacing the string after ‘client_id’ and before the ’&’ with your Client ID you saved earlier, and hit Enter to visit this URL:
https://api.instagram.com/oauth/authorize/?client_id=6c0e1e1d53714712a61e4ceb70021f6f&redirect_uri=https://www.kasetfair.com&response_type=token&scope=likes+public_content
Remember: Replace the ‘6c0e1e1d53714712a61e4ceb70021f6f’ part of this url with your Client ID. You can access the Client ID again from the Instagram Developers site on the Manage Clients page.
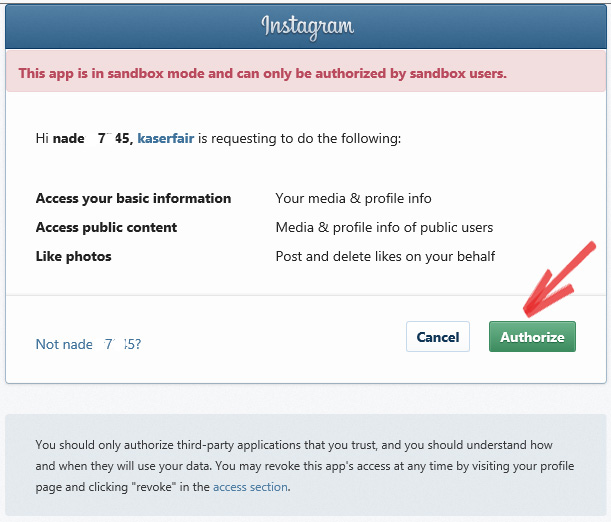
Step 9 – Authorize it.
Visiting the URL we made with the Client ID will bring up an ‘Authorize’ screen. At this point, you are using your local server to simulate an API connection, and you will Authorize it to get a view of the Access Token response. Click ‘Authorize’.
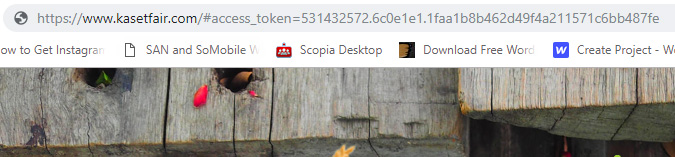
Step 10 – Access token.
This page appears broken, but it has a critical bit of data in the URL… right after ‘#access_token=’ you can grab your public Access Token, which also has your ID in it.
According to this response, the access token is: 531432572.6c0e1e1.1faa1b8b462d49f4a211571c6bb487fe
User ID is the first string of numbers before the first dot (.) so the User ID here is 531432572
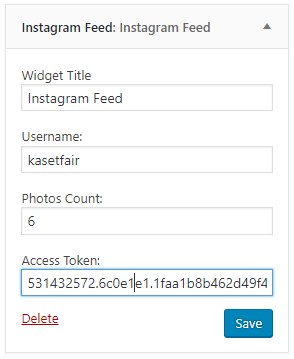
Step 11 – Copy the Access Token to the Plugin Setting
The last step is, go to the Instagram tab of your dashboard and copy the Access Token to the input box provided. Then you are ready to display your Instagram Feed on your website!
0 Comments